DIY NO SEW CURTAIN TRIM
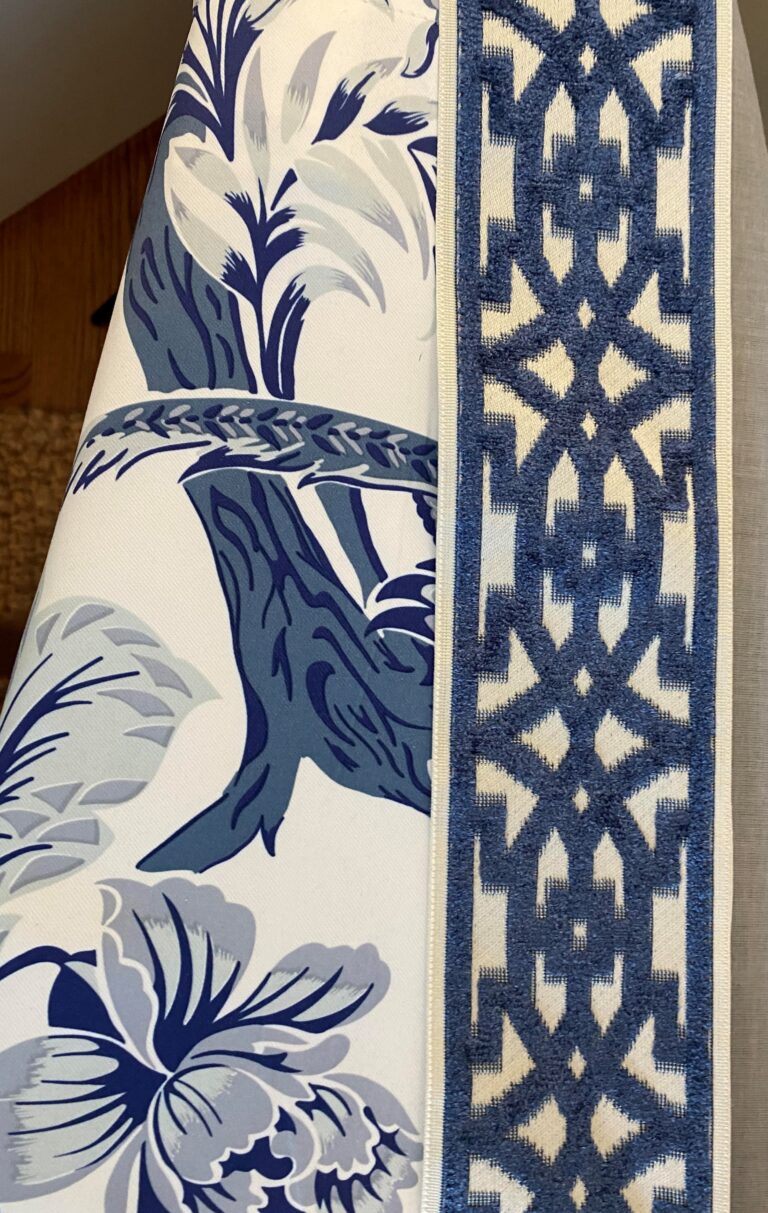
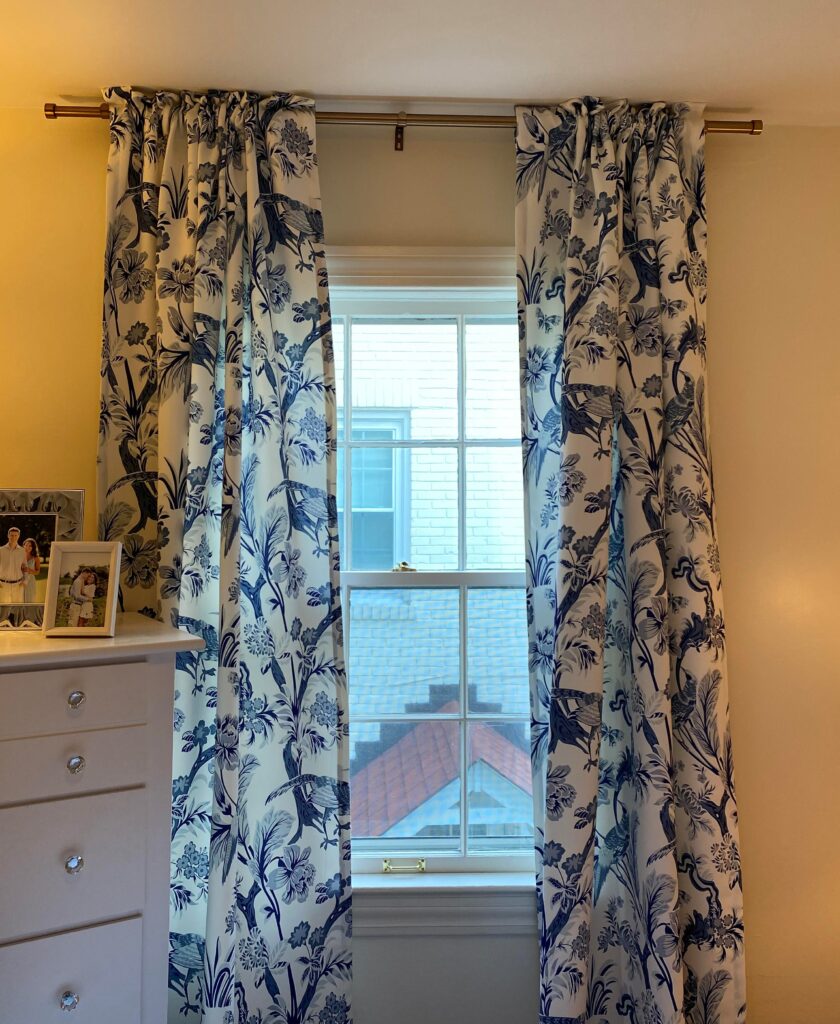
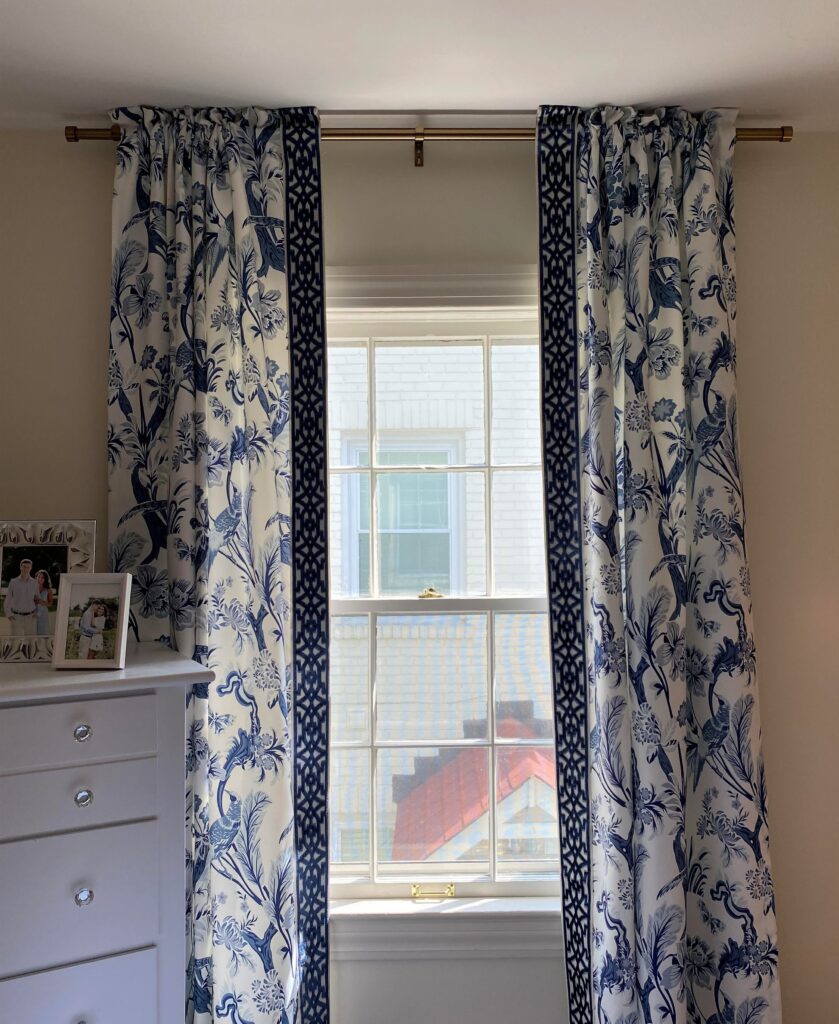
Y’all went crazy over these white curtains with blue Greek key trim in my master bedroom, which I did myself a few years ago. Since I did not document the process at the time, I decided to do the same DIY to another set of curtains to show you step by step! This time, I tweaked it to make it even more simple.
The best part of this DIY: there is no sewing required!!!
The first time I did this, I used ultra hold heat & bond. It worked really well, but I decided to try and improve the process even more time around. Ultra hold heat & bond was not necessarily hard, but it was way more time consuming than my newest method. Keep on scrolling for the incredibly simple step by step.
Everything you need for this project!
- Curtains of your choice (my chinoiserie curtains)
- Trim of your choice (my navy velvet trim)
- Fabric Adhesive
- Scissors (if your trim is not already precut to the length you need)
pREP
Make sure your curtains are clean!! If you are working with curtains you already have, you will want to wash them to get any dust off prior to starting this project.
You will want to cut your trim before getting started, if is not already cut to the needed length. I made my trim about 5 inches longer than the length of my curtains. So, I have 95in curtains and made my trim about 100in. This gave me 2.5 extra inches on the top and bottom to wrap the trim on each end. This way, it will look the most high end and ensure you do not have frayed ends showing (if your fabric was frayed from cutting it).
Once the curtains are cleaned and the fabric is cut, find a space to fully lay out your curtains. This will speed up the process so that you do not have to wait for each section to dry before moving on. I laid mine out across an ironing board and a long table.

LETS GET STARTED!!!
Lay your fabric out on a completely flat surface. Have the front of the fabric facing up. Align your trim to the inside edge of the panel. Make sure that you are working on the correct edge so that your trim is on the inside edge of the fabric like my original curtains show, not the outside edge (unless you’re wanting that!).
Once you have everything lined up, you will grab the fabric adhesive and get started!!!
Step 1 (the first video), I started at the front of the top to make sure everything properly aligned from the beginning. I applied some fabric adhesive then pressed the trim down and into place. After that, I wrapped the trim to the back of the top as shown in step 2 (second video). I applied the adhesive then clipped it to ensure that it would stay straight as I worked my way to the bottom of the panel. I continued step 3 (the third video) until I got to the bottom. At the bottom, I repeated step 2 (the second video) and wrapped the trim around the bottom edge then clipped it.
Let the panel lay completely flat and untouched until it dries. Once dry, you are ready to hang!!!
STEP 1
STEP 2
STEP 3
BEFORE

AFTER

Let me know what you think of this simple no sew DIY + share if you try this yourself!!!

An interesting discussion is price comment. I feel that you should write more on this topic, it may not be a taboo subject however typically people are not sufficient to speak on such topics. To the next. Cheers
I too conceive therefore, perfectly written post! .
I like this website very much so much great info .
As I website possessor I believe the content material here is really superb, regards for your efforts.
Live concerts have a special magic. No recording can ever capture that raw energy of the crowd and the artist performing in the moment.
Live concerts have a special magic. No recording can ever capture that raw energy of the crowd and the artist performing in the moment.
Watching a sunset over the ocean is one of the most peaceful experiences in life. Nature has a way of reminding us how small but connected we all are.
Japan is definitely on my bucket list! The mix of tradition and modernity is fascinating, and the food alone is enough reason to visit.
All knowledge, it is said, comes from experience, but does that not mean that the more we experience, the wiser we become? If wisdom is the understanding of life, then should we not chase every experience we can, taste every flavor, walk every path, and embrace every feeling? Perhaps the greatest tragedy is to live cautiously, never fully opening oneself to the richness of being.
The cosmos is said to be an ordered place, ruled by laws and principles, yet within that order exists chaos, unpredictability, and the unexpected. Perhaps true balance is not about eliminating chaos but embracing it, learning to see the beauty in disorder, the harmony within the unpredictable. Maybe to truly understand the universe, we must stop trying to control it and simply become one with its rhythm.
I wanted to thank you for this great read!! I definitely enjoying every little bit of it I have you bookmarked to check out new stuff you post…
Friendship, some say, is a single soul residing in two bodies, but why limit it to two? What if friendship is more like a great, endless web, where each connection strengthens the whole? Maybe we are not separate beings at all, but parts of one vast consciousness, reaching out through the illusion of individuality to recognize itself in another.
Virtue, they say, lies in the middle, but who among us can truly say where the middle is? Is it a fixed point, or does it shift with time, perception, and context? Perhaps the middle is not a place but a way of moving, a constant balancing act between excess and deficiency. Maybe to be virtuous is not to reach the middle but to dance around it with grace.
Virtue, they say, lies in the middle, but who among us can truly say where the middle is? Is it a fixed point, or does it shift with time, perception, and context? Perhaps the middle is not a place but a way of moving, a constant balancing act between excess and deficiency. Maybe to be virtuous is not to reach the middle but to dance around it with grace.
Man is said to seek happiness above all else, but what if true happiness comes only when we stop searching for it? It is like trying to catch the wind with our hands—the harder we try, the more it slips through our fingers. Perhaps happiness is not a destination but a state of allowing, of surrendering to the present and realizing that we already have everything we need.
The potential within all things is a mystery that fascinates me endlessly. A tiny seed already contains within it the entire blueprint of a towering tree, waiting for the right moment to emerge. Does the seed know what it will become? Do we? Or are we all simply waiting for the right conditions to awaken into what we have always been destined to be?
The potential within all things is a mystery that fascinates me endlessly. A tiny seed already contains within it the entire blueprint of a towering tree, waiting for the right moment to emerge. Does the seed know what it will become? Do we? Or are we all simply waiting for the right conditions to awaken into what we have always been destined to be?
Virtue, they say, lies in the middle, but who among us can truly say where the middle is? Is it a fixed point, or does it shift with time, perception, and context? Perhaps the middle is not a place but a way of moving, a constant balancing act between excess and deficiency. Maybe to be virtuous is not to reach the middle but to dance around it with grace.
Of course, what a fantastic blog and enlightening posts, I definitely will bookmark your blog.Have an awsome day!